1993 TO 2005 DYNA MAIN HARNESS REPAIR
If you own 1993 to 2005 Harley Davidson Dyna model, you may already be aware that the majority of this motorcycles main harness runs, internally, through the backbone of the Dyna frame. Many owners become acquainted with this design for the first time when they install different handlebars that require the handlebar switch harnesses to be extended, wired internally, or both. Unfortunately, the space inside the backbone of these frames is a common area for mice to settle and nest.
That was the case with a 1996 Dyna Wide Glide that was, recently, In The Shop.
The customer stated that the motorcycle would not start. After a few quick probes with a test light, it was determined that power to the right side RUN and START switches (the solid grey wire) was shorted to ground. We also noticed that there was no voltage getting to the right side turn signal switch. The next step would be for us to begin pulling the main harness forward and out of the frame near the neck. From memory, we knew that the plug we would need to access was furthest into the frame.
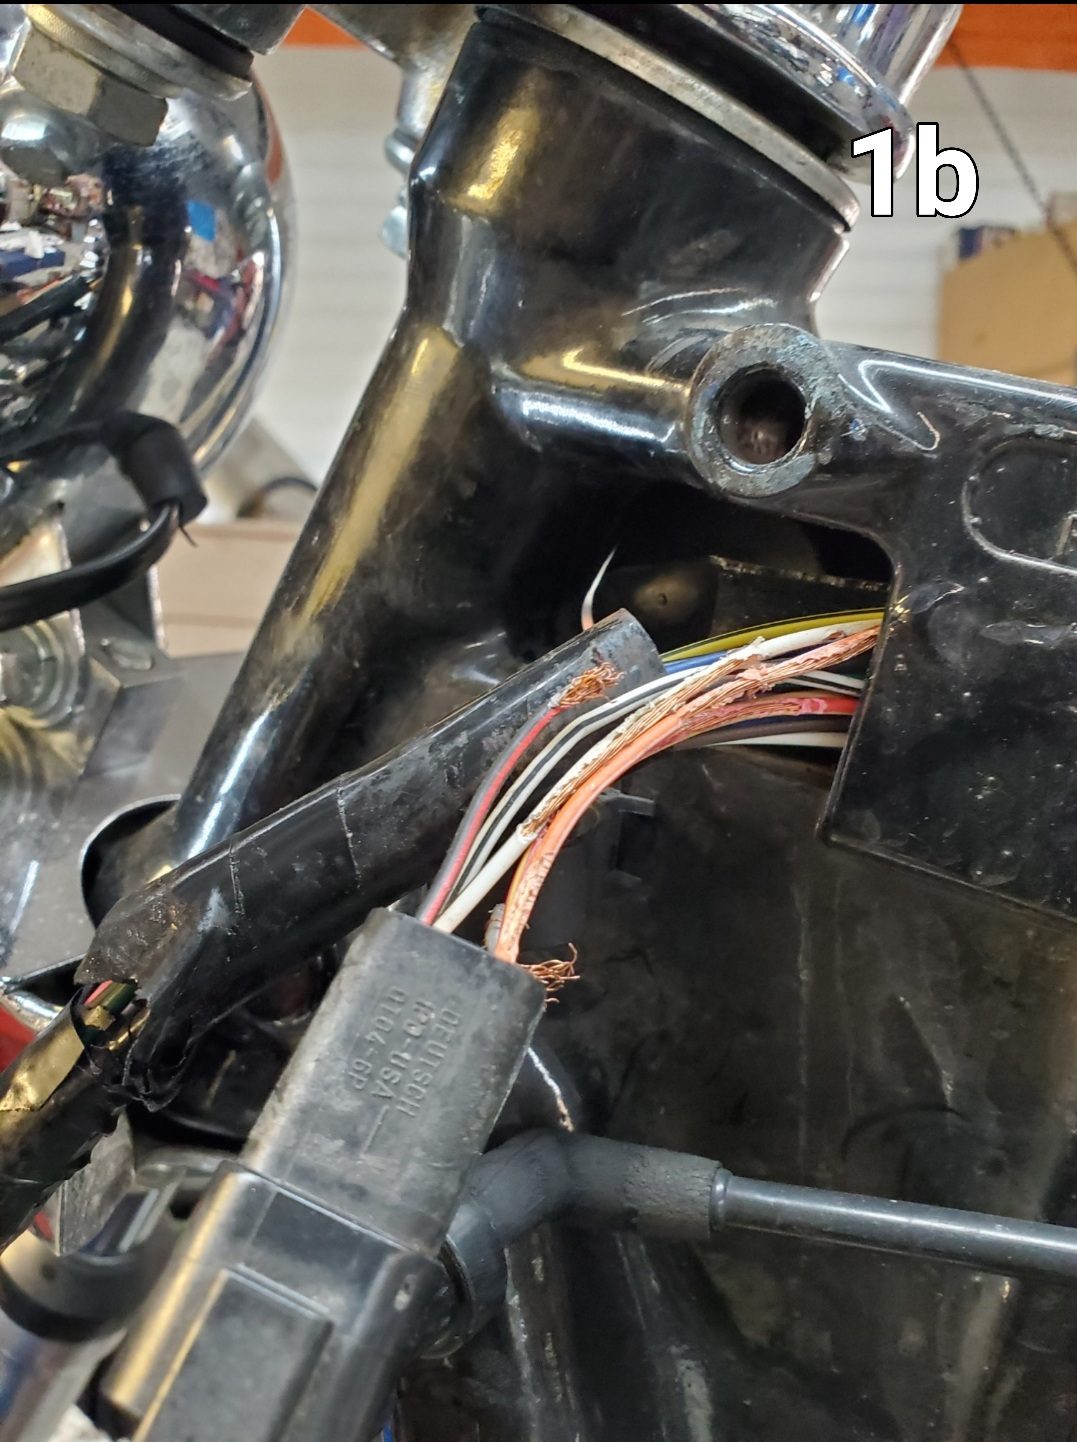
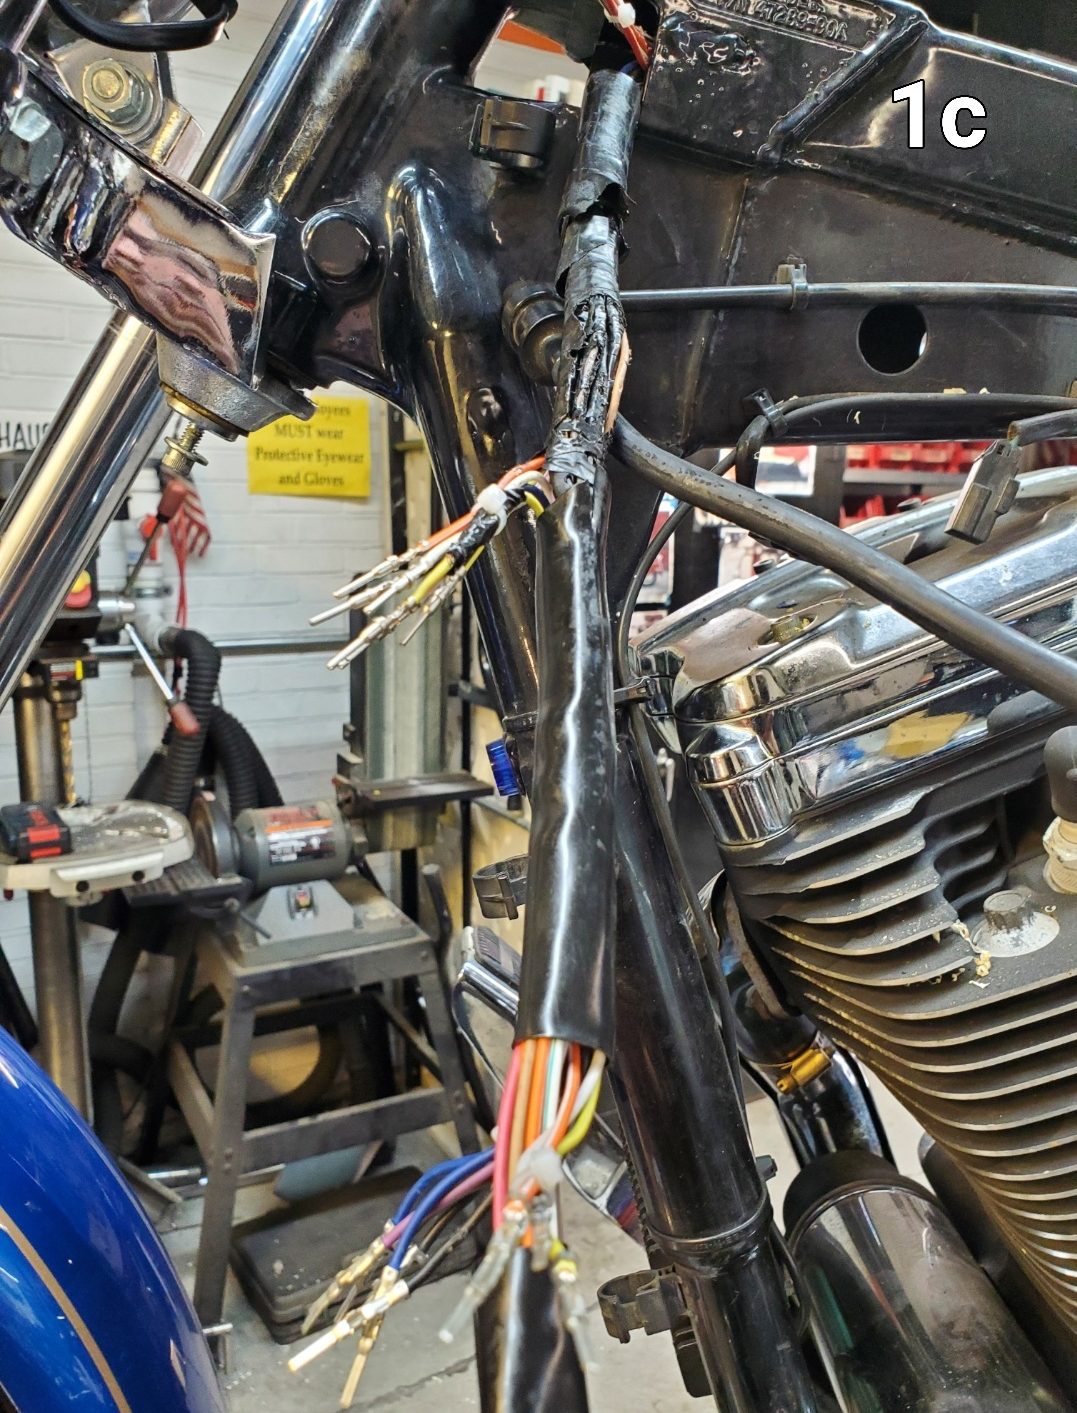
As we began to pull the harness, we discovered that someone had already, previously, made a poor attempt to repair what looked like mouse damage from an earlier date. Needless to say, we had our work cut out for us (1a,b,c).

 The more recent wire damage was so far deep that the harness would have to be unplugged in the front and pulled out through the rear of the frame in order for repairs to be made.
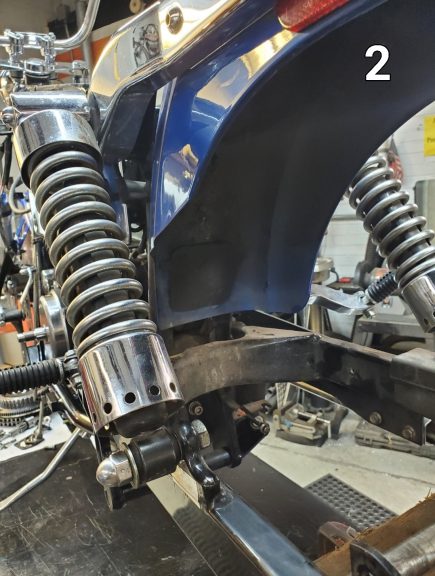
The rear wheel was removed (2)
The more recent wire damage was so far deep that the harness would have to be unplugged in the front and pulled out through the rear of the frame in order for repairs to be made.
The rear wheel was removed (2)
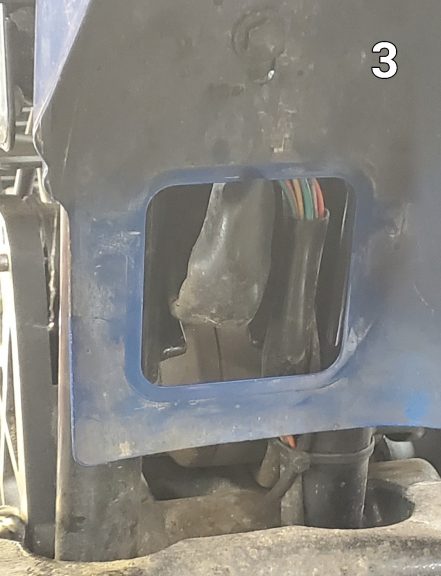
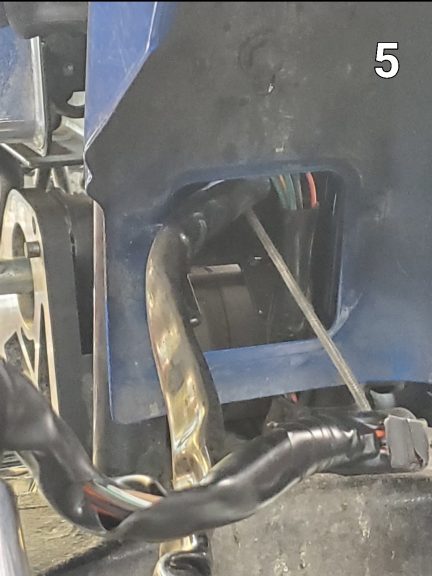
 and the rubber harness access plug, in the front of the rear fender, was also removed (3).
 Electrical plugs were removed from the harness on the front end and a string was secured onto the end to help pull the harness back after repairs were made (4). Only the plug for the indicator harness was left on for this repair.
With the harness completely out of the frame (5), we were able to make our repairs.
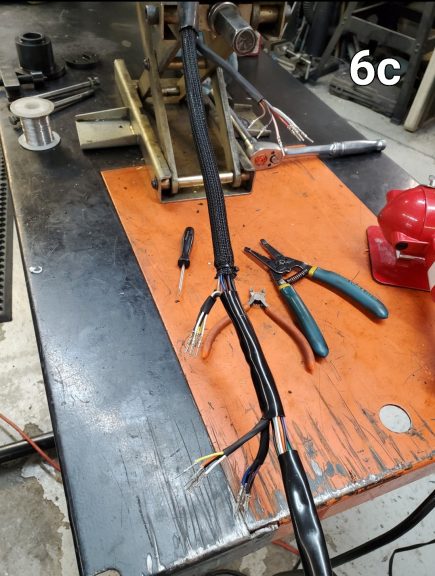
 Our goal is to always restore the harness and connections so that they are as close as possible to their original, stock configurations. This is vitally important for this Dyna Harness. The plugs need to be staggered and staggered lengths need to remain the same (6a,b,c,d).
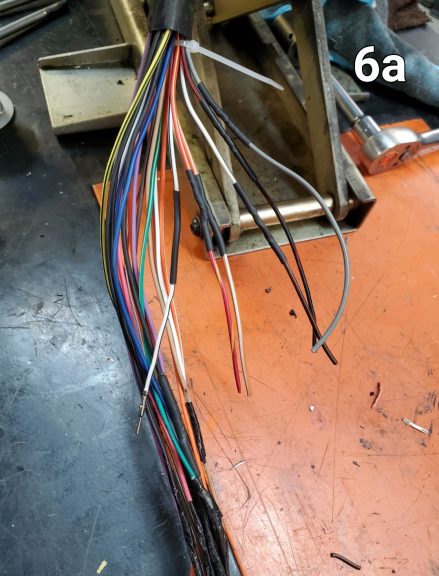
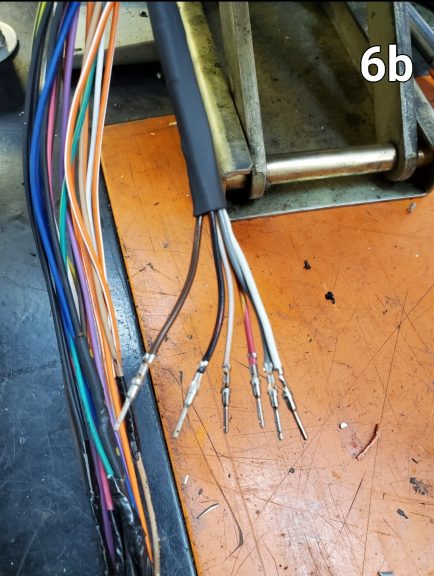
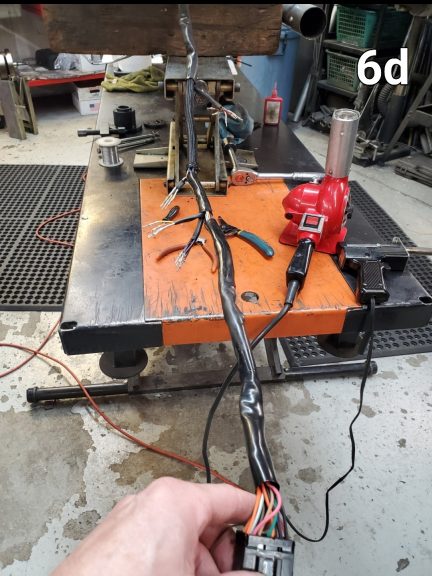 This is especially important when it comes to pulling the harness back into the frame after all connections are finalized.
Wiring and connections from the switches and turn signals were also repaired at this time. Before pulling the harness back through the frame, we took the time to throughly blow remaining mice debris out the frame with compressed air (7).
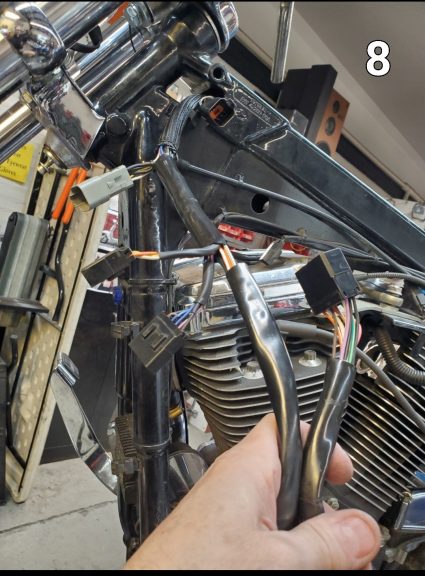
 Once the harness was pulled forward (8)
 plugs were reinstalled and connected (9).
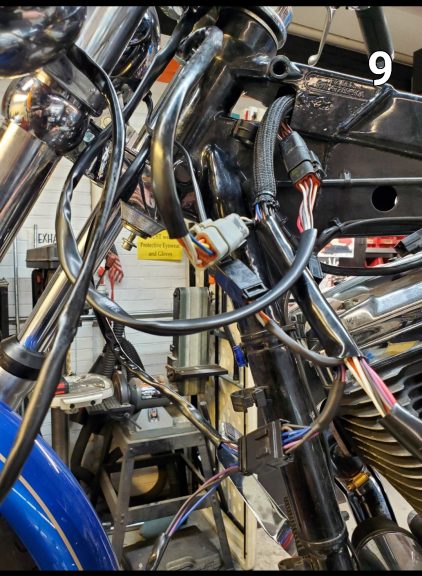 All electrical functions were thoroughly tested before pulling the harness neatly, back, into the frame (10).
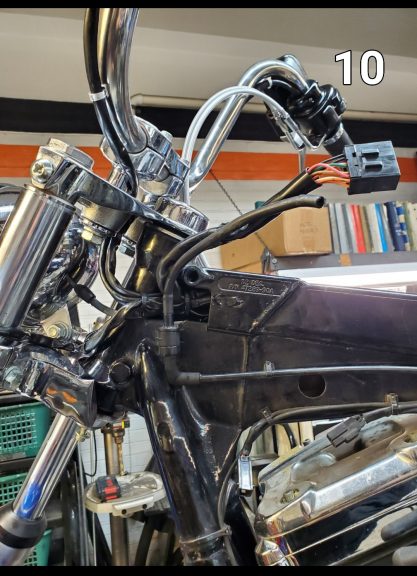 It is important to note: Although dealing with a lot of harness and plugs, moving the harness in and out of the frame is not very difficult. However, it will take a little time and patience.
Related Must Watch Video Projects
Electrical SystemsHarley Frame Swap
Handlebars 101
Dyna Gas Tank Removal

Share tips, start a discussion or ask one of our experts or other students a question.
Already a member? Sign in
No Responses to “In The Shop: Dyna Main Harness Repair”