We don’t have content on the V-Rod but they are out there and we wanted to give a look at the motorcycle and the air box. There are a number of maintenance procedures and repairs on a V-Rod that will require the removal of the air box. On a V-Rod, even a simple battery replacement will take more than a few minutes to complete.
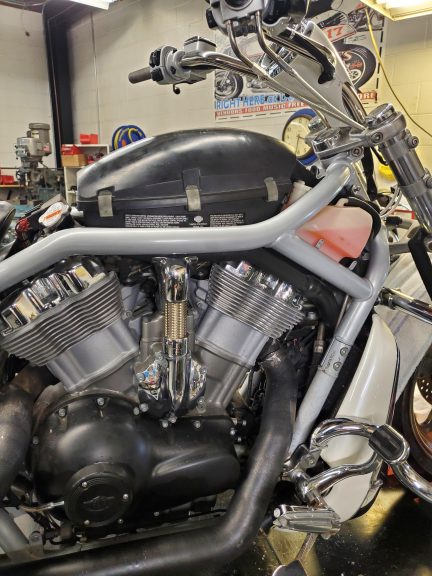 Recently, we had a customer drop off his 2003 V-Rod with a take off set of V-Rod handlebars that he wanted installed.
The throttle cable, idle cable, hydraulic clutch line, and front brake line needed to be 4 to 6 inches longer than what the motorcycle had rolled in with.
Recently, we had a customer drop off his 2003 V-Rod with a take off set of V-Rod handlebars that he wanted installed.
The throttle cable, idle cable, hydraulic clutch line, and front brake line needed to be 4 to 6 inches longer than what the motorcycle had rolled in with.
 OEM V-Rod parts are becoming more and more difficult to find. Many important components have now become obsolete by Harley-Davidson.
Fortunately, more common service and repair parts are easily obtainable through the aftermarket companies. We took some measurements and placed an order. Once the cable’s were delivered, we started the job by removing the motorcycle’s air box.
OEM V-Rod parts are becoming more and more difficult to find. Many important components have now become obsolete by Harley-Davidson.
Fortunately, more common service and repair parts are easily obtainable through the aftermarket companies. We took some measurements and placed an order. Once the cable’s were delivered, we started the job by removing the motorcycle’s air box.
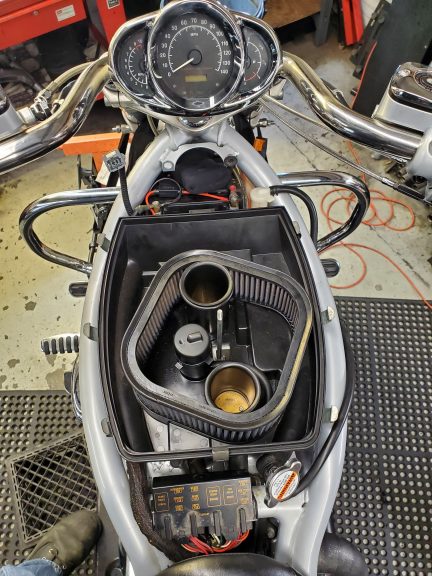 To remove the air box, start by unlocking and lifting the seat.
Remove the air box cover by turning the single bail-head fastener 1/4 turn counterclockwise. Then, pull the cover away from the locating hole allocations.
To remove the air box, start by unlocking and lifting the seat.
Remove the air box cover by turning the single bail-head fastener 1/4 turn counterclockwise. Then, pull the cover away from the locating hole allocations.
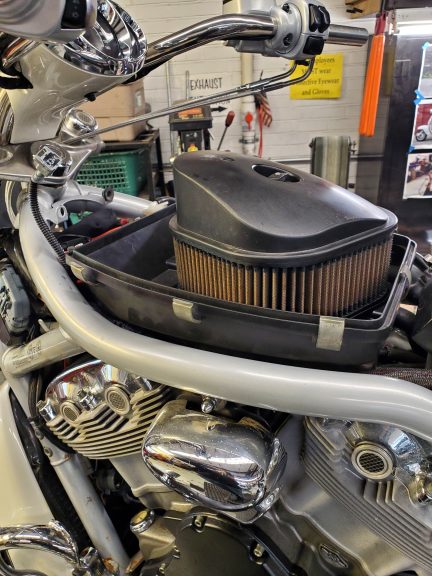
 Remove the IAT connector from the air box top. Then, release the eight retaining clips that retain the top and lift it off of the air box assembly.
Next, remove the wing nut that secures the filter cap and air filter and remove both. Disconnect the breather hose located near the rear velocity stack.
Remove the IAT connector from the air box top. Then, release the eight retaining clips that retain the top and lift it off of the air box assembly.
Next, remove the wing nut that secures the filter cap and air filter and remove both. Disconnect the breather hose located near the rear velocity stack.
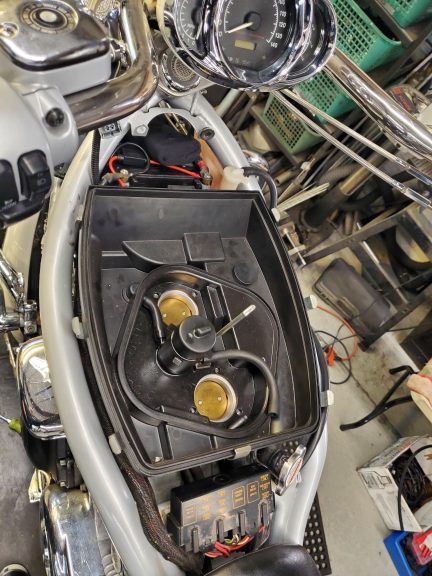
There are two velocity stacks. Sliding the two velocity stack o-rings upward will expose the six retaining screws. Use a long 5mm allen to remove the screws and then the stacks can be removed.
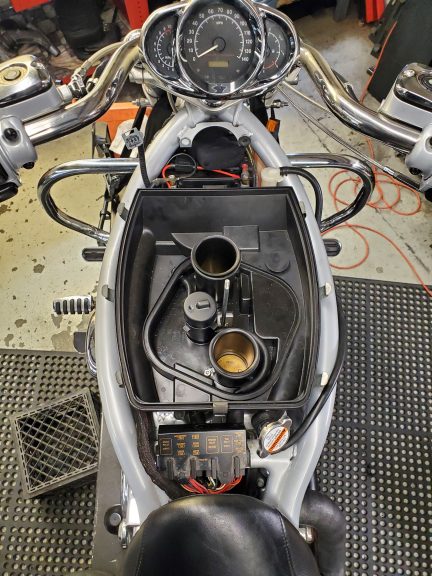
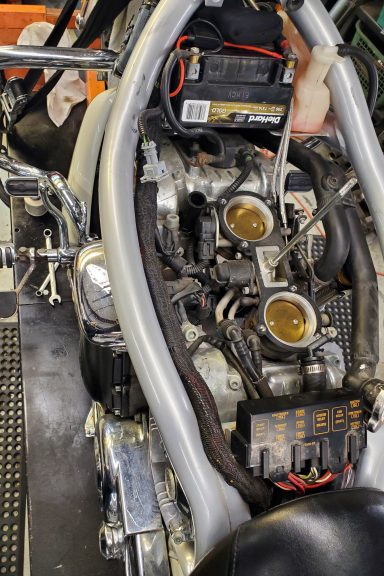
Now, gently lift the air box bottom. The front breather hose is a press fit and will easily disconnect. The rear breather has a screw style clamp that secures the hose to the bottom air box. Once the clamp is released, the air box bottom can be lifted completely away from the motorcycle. With the bottom air box removed, the battery can easily be viewed or accessed. The throttle body assembly is also easily accessible. Re-assembly of the air box is in reverse. The velocity stacks each have a mark on the bottom flange for proper orientation.
Check out all the M8, Twin Cam, Evo, XL Maintenance videos here on Fix My Hog

Share tips, start a discussion or ask one of our experts or other students a question.
Already a member? Sign in
No Responses to “In the Shop: V-Rod Air Box”