Video Download
Prepping Your Harley for Paint Volume 1
$19.99
Item:
Y0C47U
Description
Video Download: Prepping Your Harley for Paint Volume 1
56 minutes.
Chapter Topics:
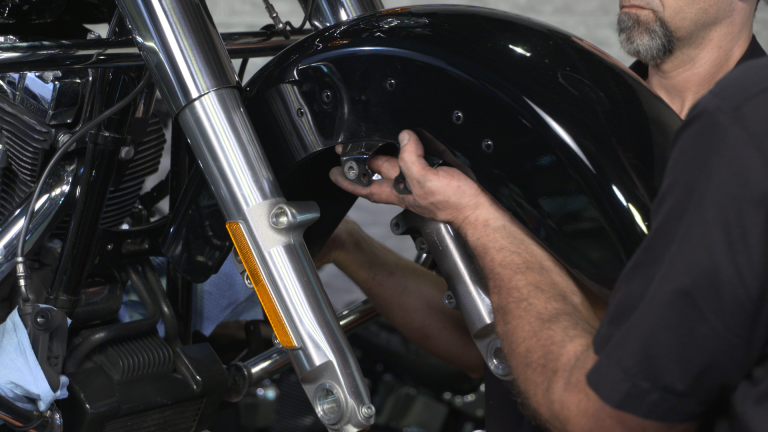
In this video Bob and Mark walk us through Harley front fender removal. This procedure will be similar on most Harley-Davidsons. There are a number of reasons you may need to remove your front fender. The most common reasons would be to replace your fork seals, removing your lower sliders to replace with chrome, or a different style lower slider. Another reason for removal would be for paint correction or customization.
Before starting dis-assembly, you always need to figure out your game plan. Think through the dis-assembly and plan the steps you will take to complete the task. Reference your service manual and make sure you have a safe place to set the Harley front fender when it is removed. The two most important things to have are painters tape and a second set of hands. Tape any areas that that are in danger of contacting other surfaces. Remove the mounting hardware and with your second set of hands, carefully remove the fender. Before setting the fender aside, now is the perfect time to practice fender installation. Take some time and re-install the fender. Make sure not to hit any areas that would cause damage.
Set the fender aside on a clean, soft surface. Now the fender can easily be stripped, if necessary.
When you have a game plan, and a second set of hands, Harley front fender removal is easy.
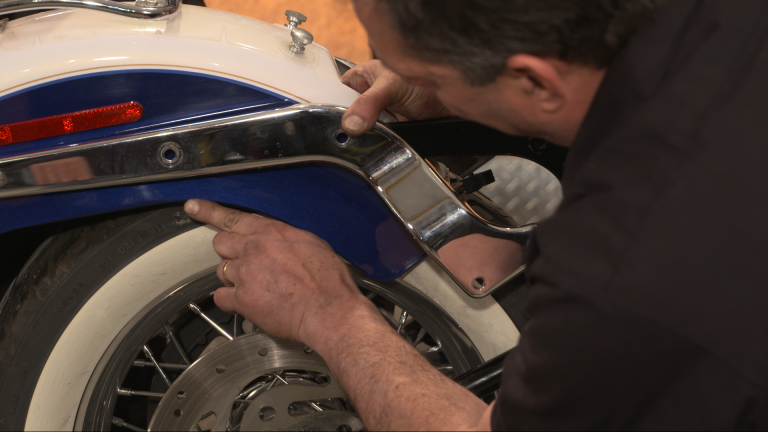
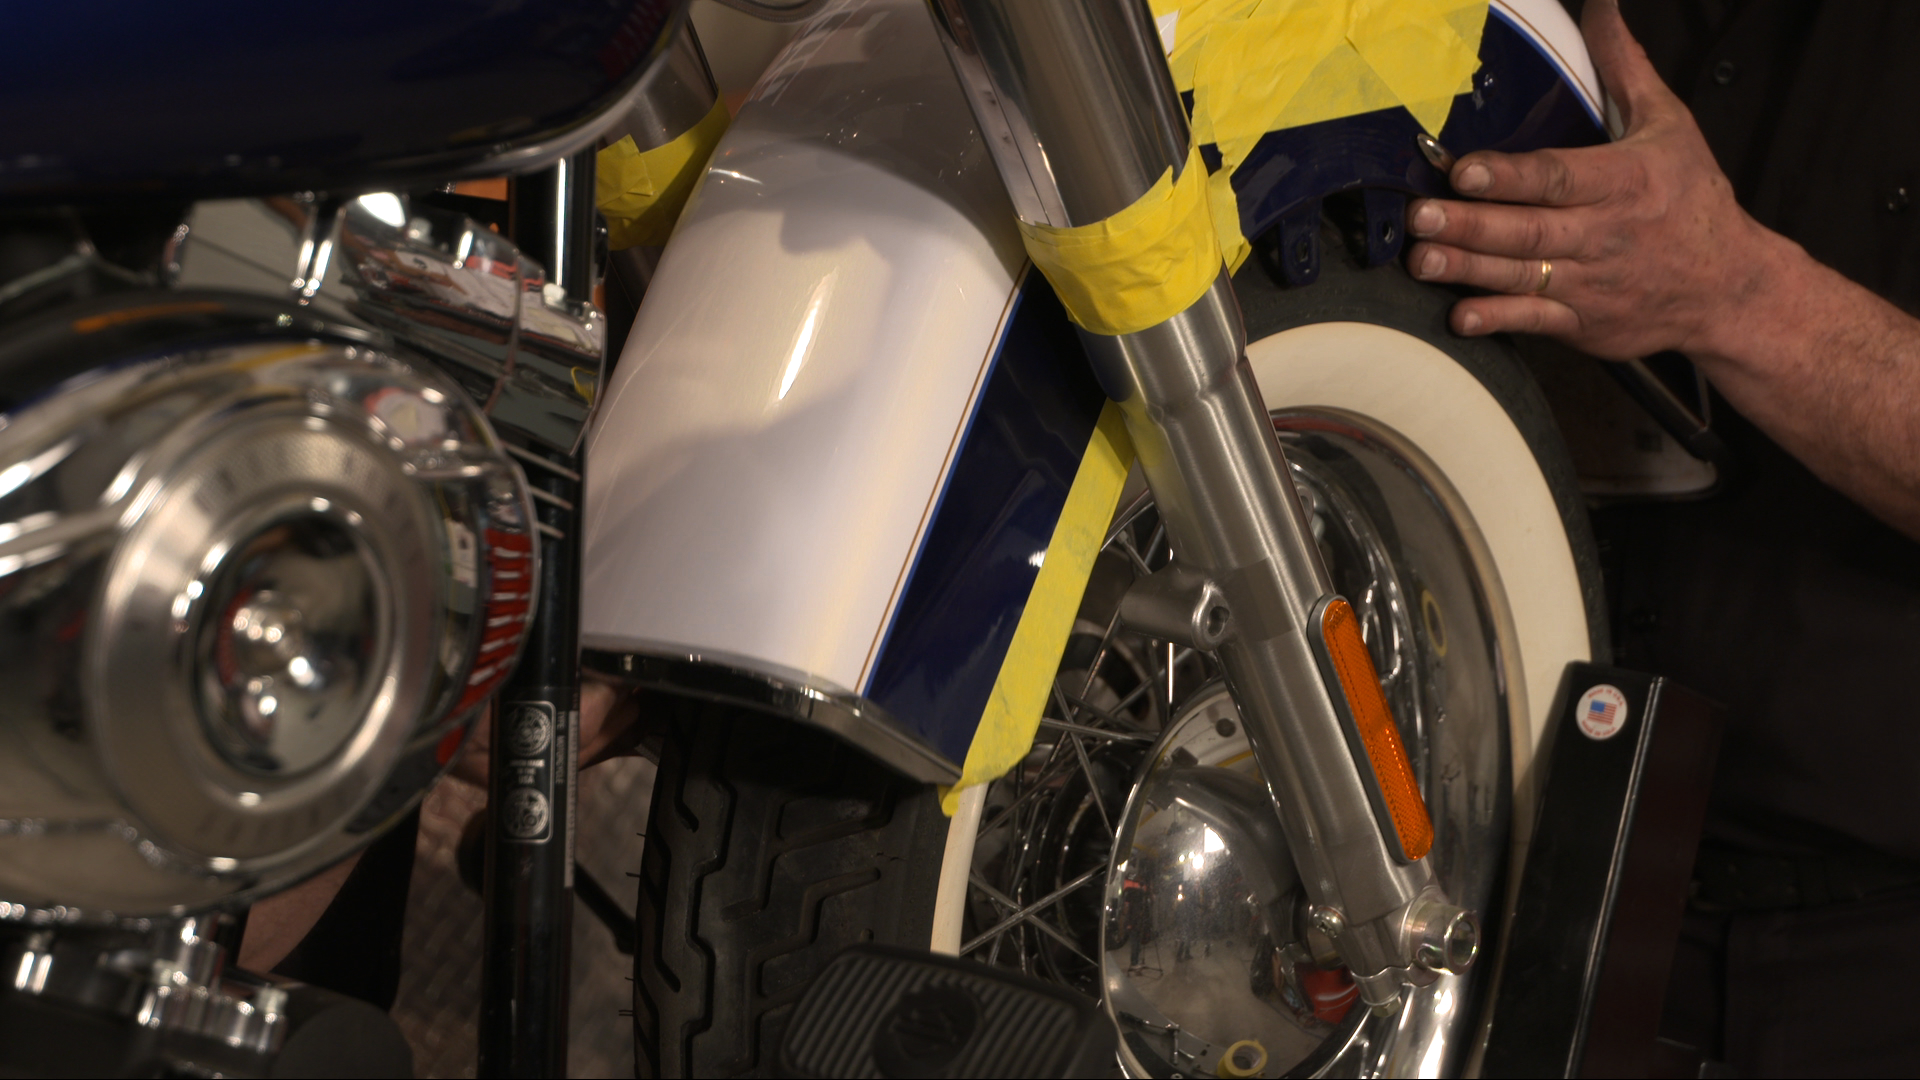
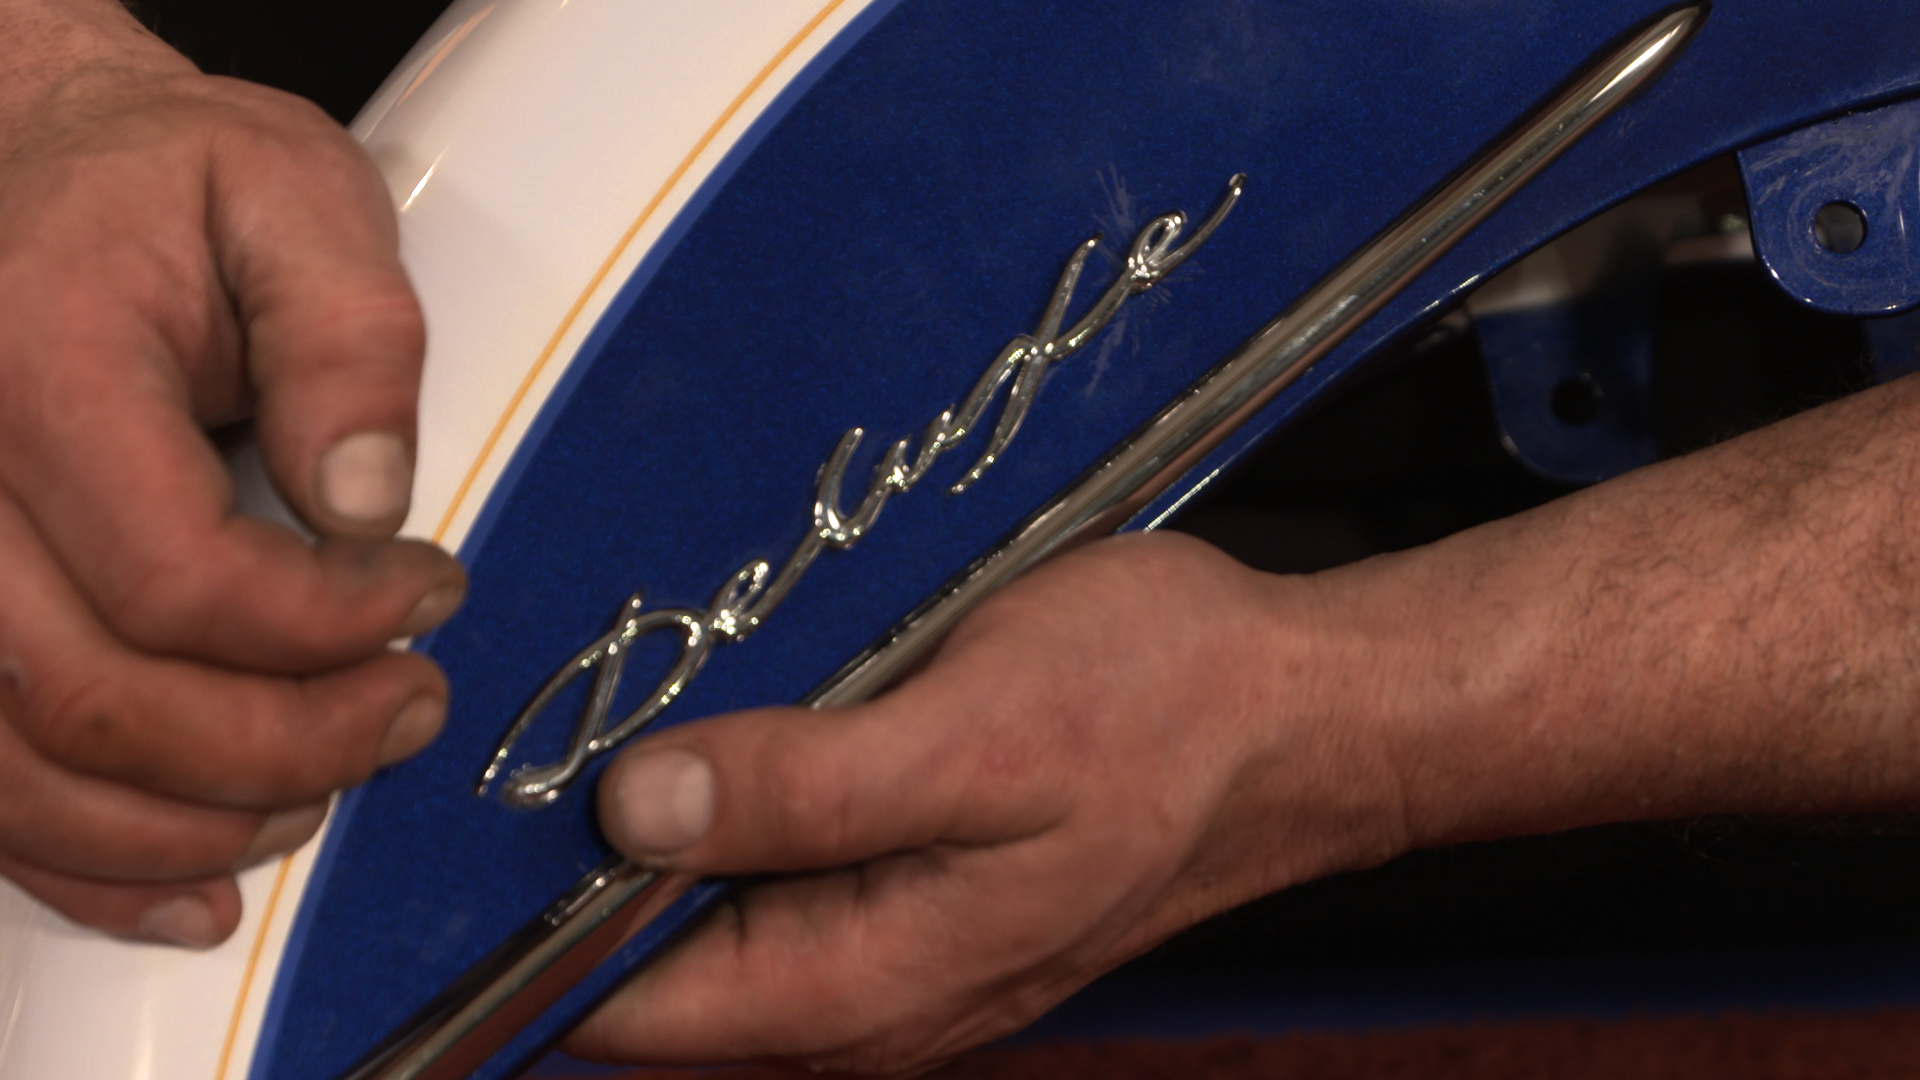
If you want to paint your Harley you will need to remove your fenders and remove all of your harley front fender hardware. In this video Bob shows us how to remove the fender spears and badges on the Softail Deluxe front fender. Whether you are having your fender repaired, or having it sent off for a custom paint job, you need to have your fender prepared for your painter. This means stripping the fender of everything that is attached to it. Do not leave it up to your painter to disassemble your fender trims and badges. Typically a painter will want to get right to work on your piece. They will not want to spend time dismantling what should have already been dismantled. Also, do not count on your painter to know how to disassemble your Harley front fender. If you do send your fender assembled, expect it to come back to you unassembled and with parts missing. No offense to any painters out there. But, you can’t blame them. They want to paint! Don’t waste their time.
Always clean your Harley front fender inside and out before trying to remove any hardware. Work on a soft surface like a clean bath towel to avoid scratching the paint. Using compressed air is helpful for blowing out loose debris that may be trapped inside the fender. Fender spears are typically secured with T bolts and nyloc nuts. When removing this hardware, notice that there are two different size T bolts. Note their location for reassembly. If your fender has a illuminated front fender lamp, you will have two wires running through your left side spear. This wire runs above the T bolts within the spear. Note the orientation of this wire. You will need to have it enter and exit the same fender holes upon reassembly. Draw yourself a diagram or take pictures if necessary. If the wires are not correctly routed, they may become pinched, creating a dead short and blowing a fuse, or tripping a breaker.
Badges are typically secured with spring style clips. You can remove these by carefully prying with a small pick, or screwdriver. Be careful not to pry too hard against the Harley front fender causing unnecessary damage. The spring clips are cheap and should be replaced, rather than reused. It is important to practice patience when working with painted pieces. Take your time and work clean. When the job is completed correctly you can take a step back and admire your good work. It always feels good when you complete a job the right way, the first time.
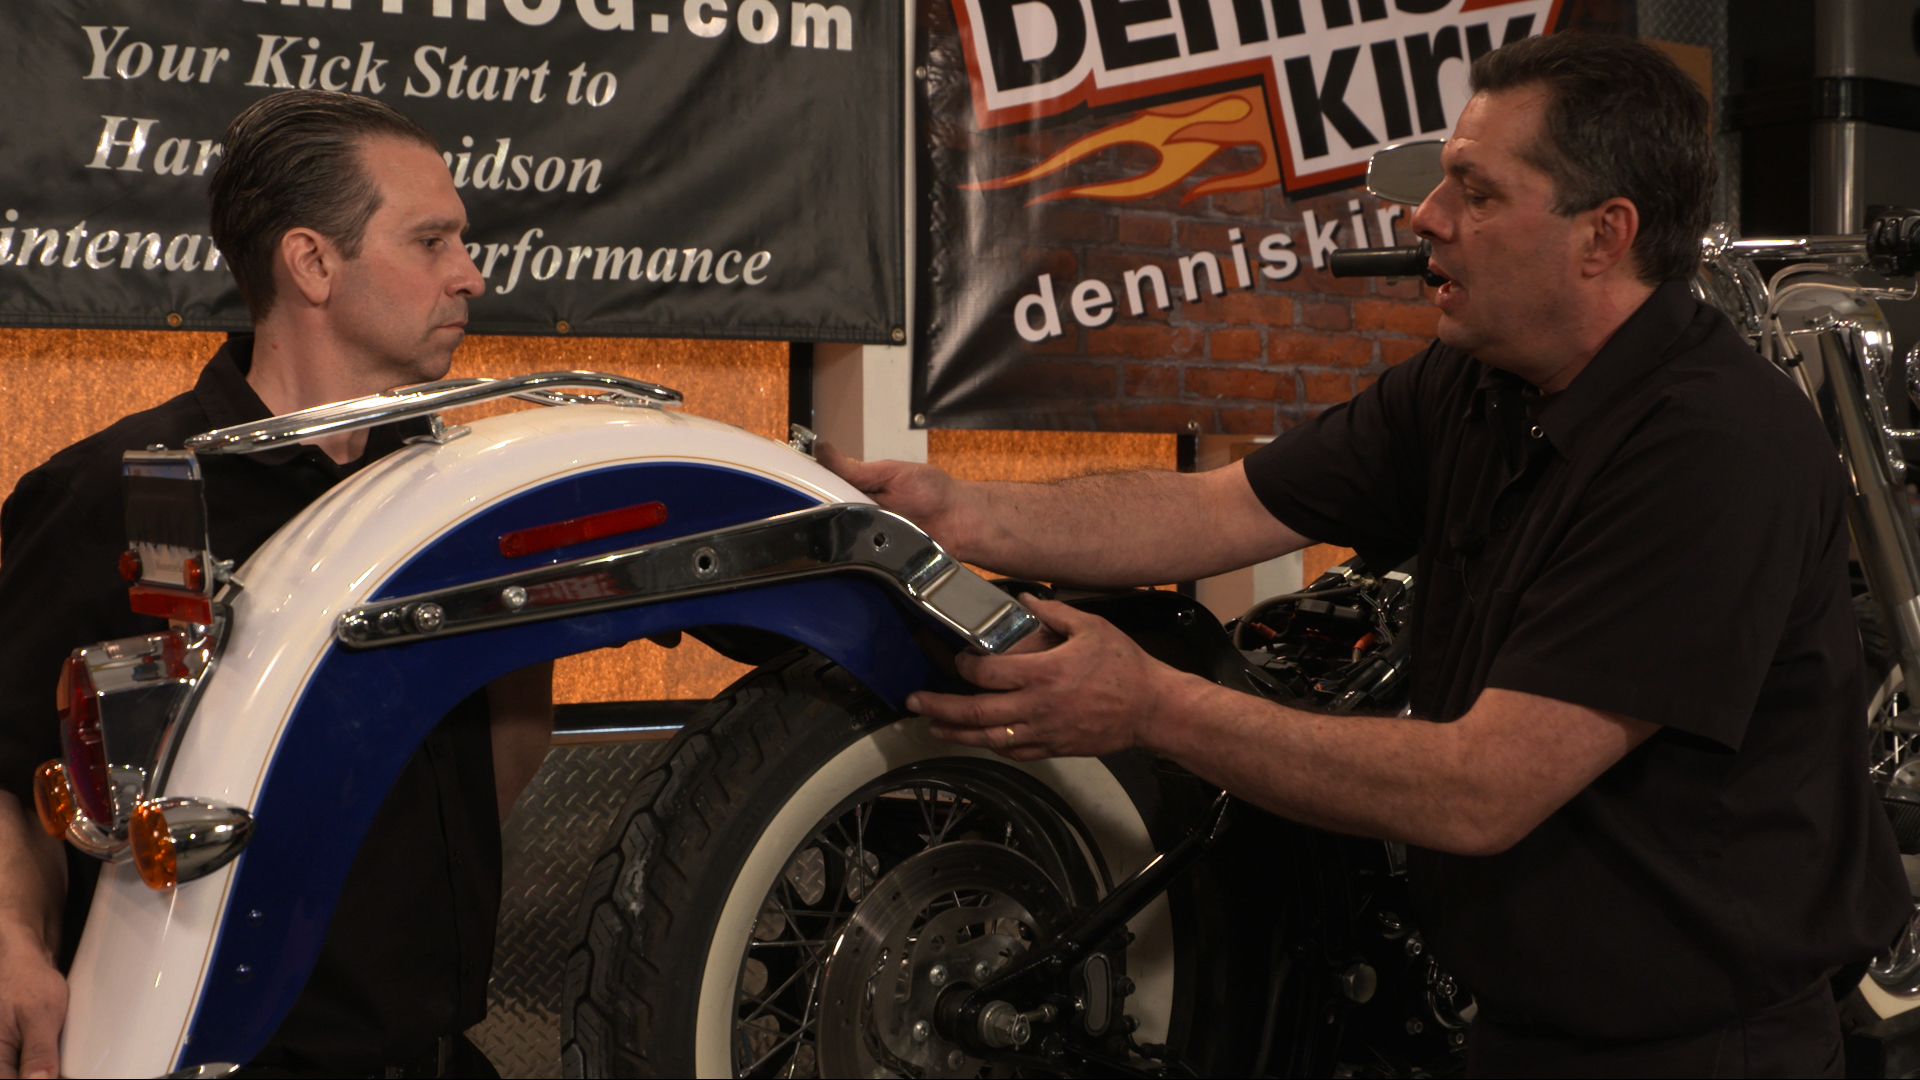
In this video Bob and Mark walk us through Harley Davidson rear fender removal. Whenever you are handling painted components, you should be working with a second set of hands. It is important to use painters tape to protect any areas of the fender that may make contact another surface. Also, never begin disassembly without having a definitive game plan. Know what you are going to do before you do it. Reference your factory service manual to aid you in planning the specific steps necessary to remove the component. Have a safe place prepared where you can set the fender after it is removed from the motorcycle.
It is best to remove a Harley Davidson rear fender as a complete assembly. Unplug any wiring. If your motorcycle has an ECM, remove the plastic pin that retains the plastic pocket. This should stay with the motorcycle. Fender hardware will vary depending on year, make, and model but disassembly is typically the same. Loosen and then remove the hardware located in the first and second allocations of your left and right side struts. Always note hardware orientation and location. Temporarily support the fender with 2 long screwdrivers or rods. Remove the hardware that mounts the struts to the frame, then you can carefully remove your two screwdrivers and slide the fender back until it is free and clear of the motorcycle. Set the Harley Davidson rear fender on a clean, soft surface. Now you can strip the entire fender if necessary.
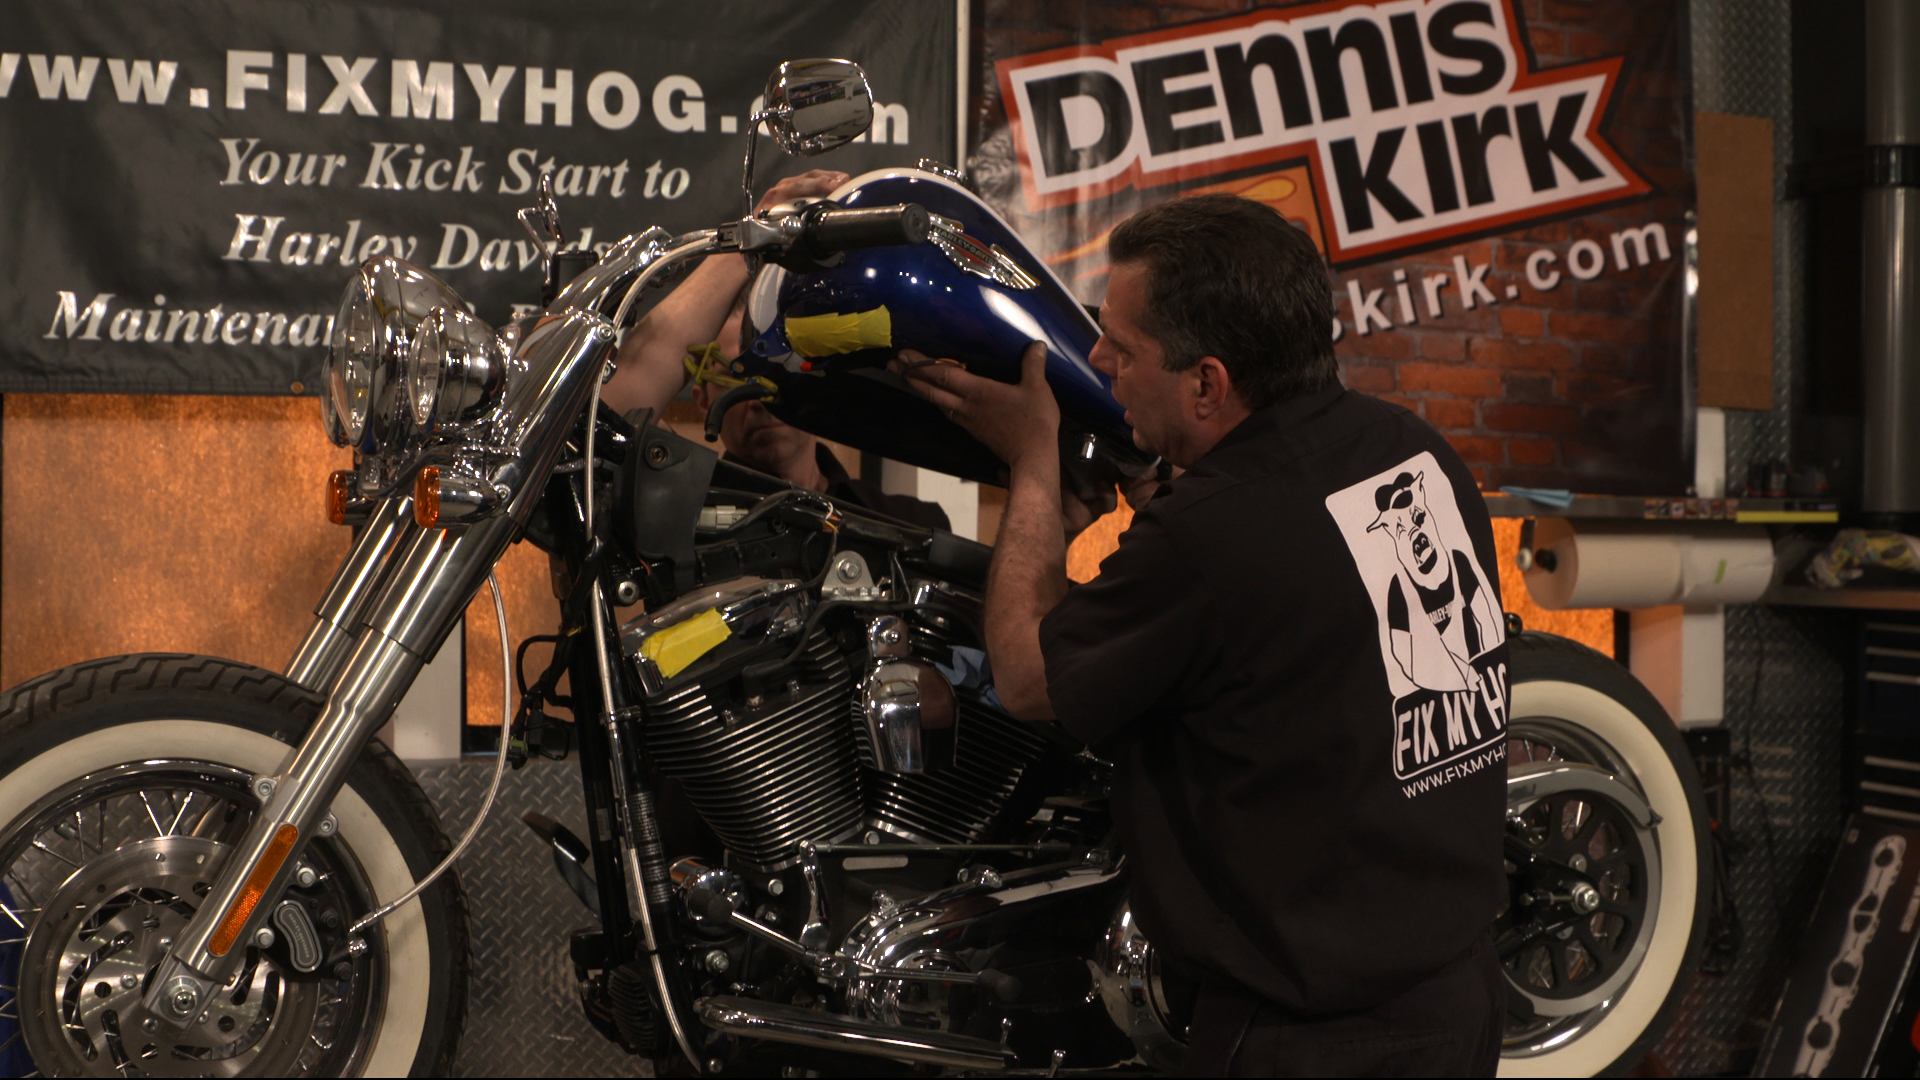
Bob and Mark walk us through Twin Cam fuel tank removal in this video. Harley Davidson Fuel tank removal is not only performed when repairing or customizing paint. It is also a critical procedure performed for a multitude of repairs. It needs to be performed carefully. It needs to be accomplished perfectly. There is nothing more irritating, or bothersome than having a scratch or dent on one if your motorcycle’s painted components.
Harley Davidson fuel tank removal is similar on most other year/model injected and carbureted Twin Cam 2000 and newer. On injected models you will need to depressurize your fuel system. Do this by removing your fuel pump fuse, start the motorcycle and let it run until it stalls. At this point, the system should be completely depressurized, but it is good to try starting the engine again in case of residual pressure. Now you can disconnect your battery and unplug your fuel feed line.
When removing your dash, it is important to have a second set of hands. Have your helper hold the dash, safely, on its side while you unplug your dash. If uncertain, it is always a good idea to take a photo, for reference, for reassembly. It is important to route the dash harness exactly the way it was routed from the factory. Note: a digital speedo should never be stored upside down, as the display can be damaged. Line clamps are helpful when disconnecting your fuel line crossover. Also, you will need to have a couple of rubber plugs handy. You need to be prepared, and take your time when draining the fuel tank. You may lose some fuel, but make it minimal if you can. Remove your tank hardware in the front and rear of the tank. Don’t forget to unplug your bike’s fuel gauge before lifting on your tank. Have a safe spot ready for your fuel tank.
Carefully lift up and back as you pull the fuel tank off of the motorcycle’s frame. Do not lift the tank into your bars, or controls. It is always acceptable to use painters tape if you feel that something is at risk of contact. Taking the extra time to be cautious can save a lot of aggravation. With the Harley Davidson fuel tank removed, now is the ideal time to clean and inspect everything and anything that you cannot view/reach when the tank is installed. Inspect your wiring harness. Check all fasteners for correct torque, clean your frame, etc.
Fuel tank removal is an important procedure. It is important that you master it the first time you attempt it. With Bob’s advice, you should be confident that you will.