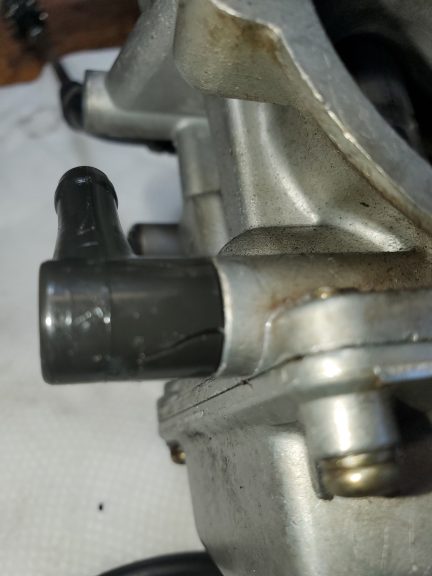
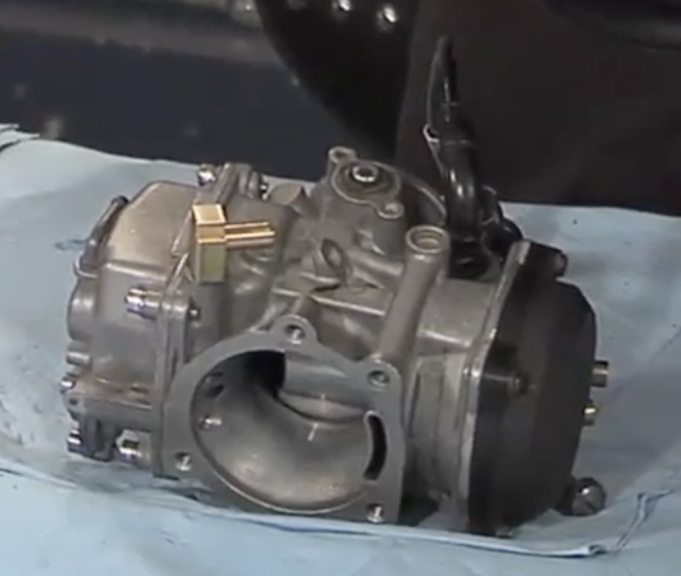
Carburetor Fuel Inlet Fitting
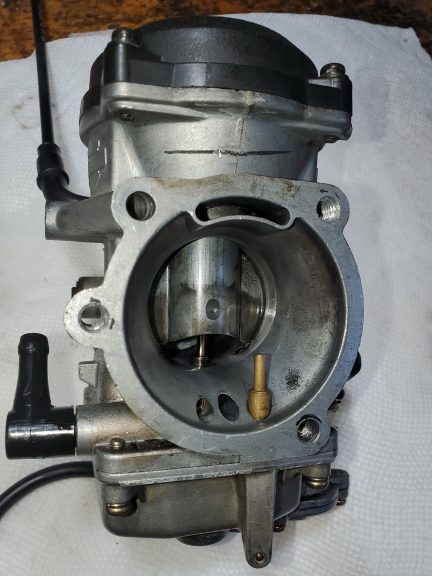
Most riders who own a Harley Davidson with a stock carburetor will inevitability have to perform this repair at some point in time. The repair we are referring to is replacement of the original carburetor fuel inlet fitting. The carburetor fuel inlet fitting on a stock carburetor is made of brass and plastic. The brass part of the fitting never fails. However, the plastic half of the fitting is a poor design. The black, plastic area of the fitting eventually becomes brittle after years of being exposed to gasoline and heat. Once compromised, the plastic begins to crack and leak gasoline that is trying to enter the carburetor body. Sometimes, the fitting will be intact but easy crack when simply pulling off the fuel delivery hose. There is a simple, permanent fix: You can replace the stock fuel inlet with an carburetor fuel inlet fitting made only of brass.
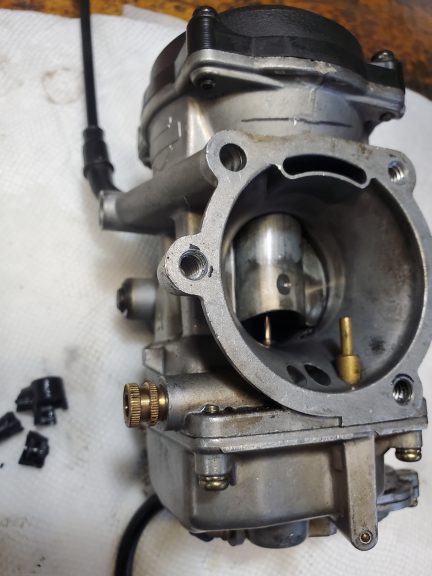
*Note: During the removal & replacement process, it is possible for debris to fall into the carburetor. We prefer to remove the float and needle valve and reinstall the float bowl prior to the repair. When the work is completed, we completely disassemble the carburetor for cleaning and inspection. Keeping the carburetor intact this way is beneficial because delicate areas of the carburetor such as the float bowl pin stand offs are protected from being damaged or broken off. Damage like this can render the carburetor a throw away.
Start with the carburetor removed from the motorcycle and on a flat work bench or flat work surface. Make a mark on the carburetor, take a picture, or make a mental note of the input orientation on the carburetor. Grab the plastic fitting with a set of pliers. Twist and break it off. You will now be left with only the straight, brass part of the carburetor fuel inlet fitting.
At this point, you can grab the carburetor fuel inlet fitting with a good vise grip pliers and firmly twist back and fourth until the fitting can be pulled out of the carburetor. This way can sometimes be difficult.
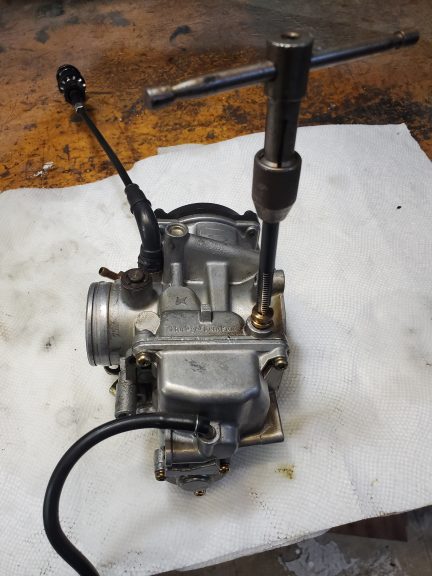
We prefer to tap the fitting with a 1/4″ – 20 tap and extract with a homemade pulling tool. The tool consists of a 1/4″ – 20 allen bolt, a nut, a washer, and a 1/4 inch drive 9/16″ socket (we cut a window in our socket to use as a sight, but that is not necessary).
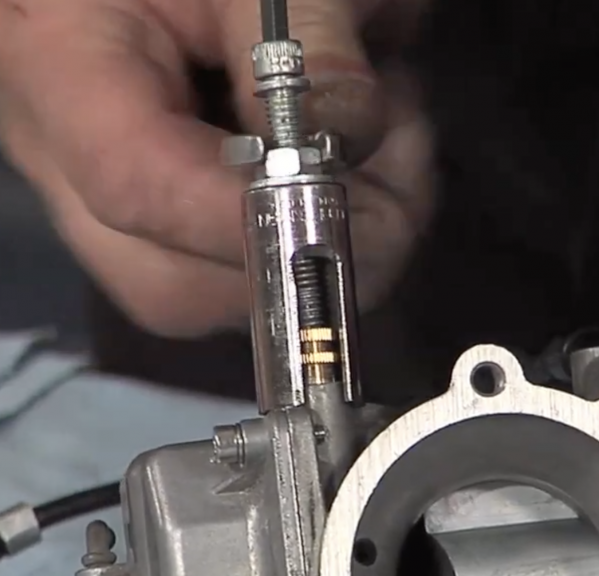
With the original carburetor fuel inlet fitting removed, lube the replacement fitting with a light wipe of green or blue Loctite. Then, patiently tap/press into place with a brass hammer. Make sure that the fitting is pointing in the same direction as the original. It is important that the carburetor fuel inlet fitting remains straight and is driven into the carburetor until it is bottomed.

Share tips, start a discussion or ask one of our experts or other students a question.
Already a member? Sign in
No Responses to “In The Shop: Carburetor Fuel Inlet Fitting”